Facebook has around 1.82 billion active users a day! A must-place to promote your business. To represent your business or group, you may need a Facebook Business Page.
Follow the simple steps below to create your own page on Facebook.
What is a Facebook Business Page?
A Facebook Page makes up a public Facebook account that can be used by organizations, brands, artists, and public personalities. Businesses use these Pages to share contact information, and content, make post updates, promote events and releases, and most importantly connect with Facebook audiences.
You can connect these Pages to Facebook Facebook Marketplace and ad accounts.
How to create a Facebook Business Page
Before you can sign up for your Facebook Business Page, you need to log into your personal Facebook account. Don’t worry—the information from your personal account will not be publicly visible on your business Page.
To create a business page on Facebook, you first need to sign in to your personal account. You don’t need to worry about privacy, as your personal information will not publicize on this page.
Business Pages are managed by one or more administrators. Your personal account will only work like a key to let you use your new business Page. If you have team members that help you with a Page, their personal accounts will also unlock their defined roles and capabilities.
Step 1: Sign up
Navigate to facebook.com/pages/create. Enter a page name and your business information in the top left panel.
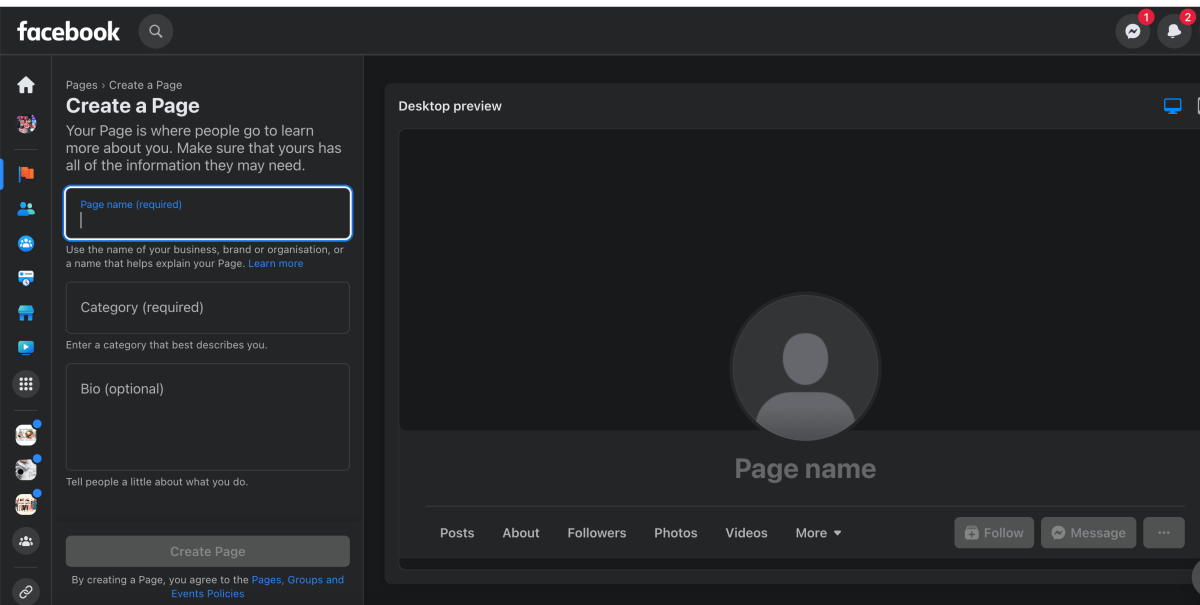
Use your business name or any common name likely under searches as your page name.
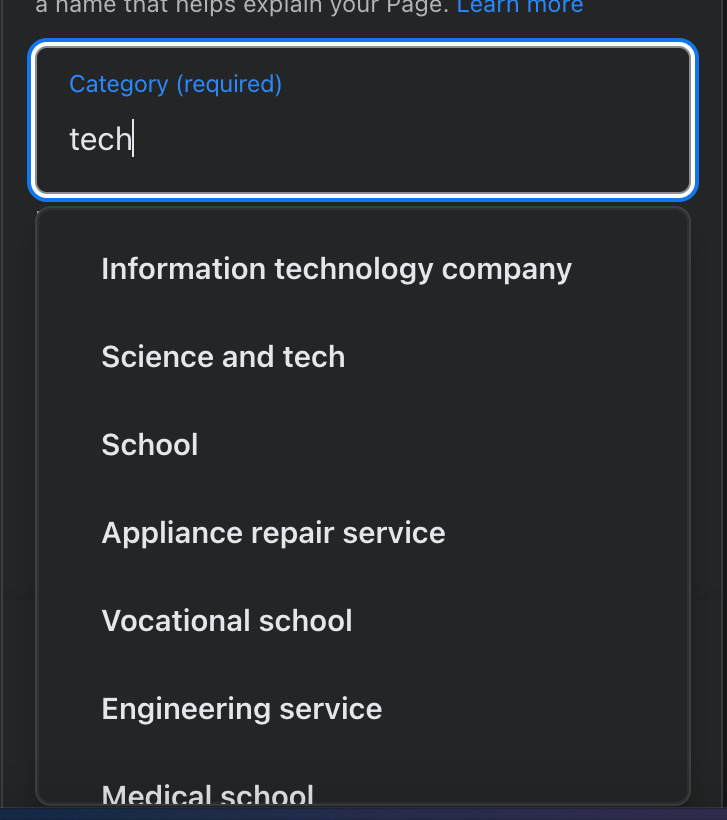
For category, choose one or two words that best describe your business. Facebook will also suggest you some options. You may choose up to three of the suggestions.
Now, fill in the Description field. Add a short description that may appear in search results. It should be of a couple of sentences (maximum up to 255 characters).
When the required details are filled in, click Create Page.
Step 2. Add images
Secondly, you may upload a profile and cover images for the Page. A good visual first impression is necessary. Make sure your images align well with your business.
Upload your profile photo first. This image comes up with your business name in search results and when users interact with you. It will also appear on the top left of your Facebook Page as your page identity logo.
If your business is a recognizable brand, you may use your company logo. If you’re a celebrity or public figure, a picture of your face will work best. In case, if you’re a local business, use a well-shot image that may be an iconic one for your business. The important factor of this image is to make a potential follower to recognize your page.
The profile image should be 170 x 170 pixels. It will also be cropped to a circle, so avoid putting any important details in the corners.
Once your selection and adjustment are done, click Add Profile Picture.
Now choose your Facebook cover image, it will be the most prominent image on your Page.
It should capture the subject matter of your business and show your brand personality. Facebook recommends choosing a large image of around 1640 x 856 pixels.
Click Add Cover Photo, after selecting and adjusting the image.
After you upload the photos, you may use the buttons in the top right of the preview to switch between desktop and mobile views. You may use these to preview how the images look in both views. Moreover, you can also drag the images to adjust their position.
You may now click Save.
Of course, while the skeleton of the Facebook Page for your business is now in place, you’ve still got a lot of work to do before you share it with your audience.
The next vital step is to promote and share your page and make it reach the target audience.
Step 3: Create a username
A username for the page is also called the vanity URL. It is the code or identity that tells people where to find your page on Facebook.
It should be up to 50 characters long, try to keep it short so people can easily remember it. Your business name or some variation or a short form of it will do best.
Click Create Username on the Page preview.
Enter a name you want to use. Facebook searches and lets you know if it’s available. Once you get a green checkmark, you are good to go. Click Create Username.
Step 4: Add your business details
It is always important to add all fields in the Facebook Page’s About section from the beginning itself.
Since Facebook is mostly the very first page a customer or follower searches for someone or a business. An up-to-date About on the Page is very important. Your business timing and all other critical details should be present here.
Fill in all the appropriate details, starting with your website.
After you complete, click Add an action button section.
Facebook has a built-in call-to-action button that makes it very easy to give the consumer what they’re looking for. Moreover, it allows them to engage with a business in real-time.
The right CTA button encourages visitors to learn more about a business, download its app, shop, or book an appointment.
You can add your CTA, by clicking the blue box of Add Button, then choose the type of button you want.
It is recommended to complete all these steps from the start. However, you can always access them later. From the Manage Page menu on the left, you can scroll down to Edit Page Info and update or add them anytime later.
You may go to the Manage Page menu, then click Settings, then General. Click Page Visibility and change the status to Page unpublished, if in case you want it to appear offline.
You can follow the same steps to republish your page whenever you want.
Step 5. Add a post
You should add some valuable and relevant content to your page before you invite people.
Your first post can be an introduction of your business or services, an opening event or an offer. You may click one of the options from the Create box and add the first post.
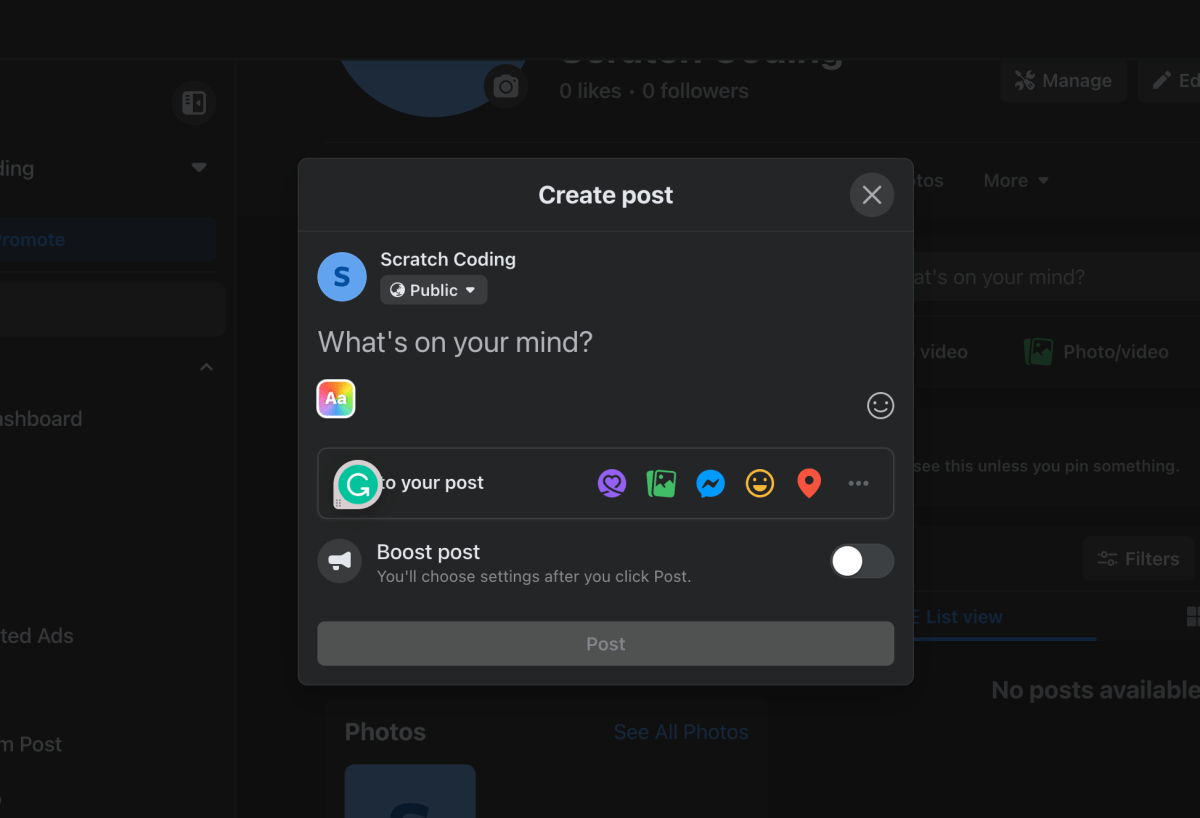
Make sure that whatever you post has good value for your visitors when they arrive at your Facebook Business Page, so they will be inclined to stick and stay around.
Step 6. Invite your target audience
The Facebook Business Page now represents a business with a strong online presence that will enforce potential customers and fans to interact with you.
You may start by inviting your current Facebook friends to like or follow your Page. Click the blue Invite Friends button that shows up a list of your personal account Facebook friends. Select the friends you want to invite, and click Send Invites.
You may also use your other social channels, like your website and Twitter, to promote this new business page. Add “follow us” logos on your email signature and promotional materials. You may also ask your customers to add reviews for you on Facebook.